So now we are on a new adventure again. For the next few titles in the series; we'll be departing from the television screen and focusing on the hand-held systems. This title, much like its predecesor on the hand-held system; is not set in Hyrule. Instead, we are invited to the land of Holodrum; where the power of seasons holds predomination over the land's welfare. A major difference one can note from the very beginning between Holodrum and Koholint is that Koholint stood alone; Holodrum is linked to Hyrule (as the NPCs of the land know of Hyrule and its mythos, which are strangely linked to Holodrum as well.) This makes the transition easier, and as we already know Hyrule is real, as Holodrum is linked to it we know that we aren't in a situation similar to Koholint right off the bat. That's good news, especially know where that plot lead.
Either way; this is also the first hand-held game made for the GBC; meaning that its graphics are much better than that of Awakening. Aside from being pretty to look at, it's schematics are very similar to that of its predescesor though it adds in things from Ocarina of Time (such as multiple menu screens and more items, as well as lengthier side-quests and a more involved plot.)
This game has been called the more action-oriented of the two, and as we go through we shall discover its unique plot.
Wednesday, November 17, 2010
Thursday, November 4, 2010
Stone Tower
This dungeon is highly original; perhaps the most original Zelda dungeon I have played. While most dungeons require you to enter once and fully explore from there; this dungeon requires you to enter and exit, and by flipping the temple, you change its structure and the puzzles within for yourself so that you can fully explore its depths. An interesting change.
Another interesting change is that the prize of this temple are the Light Arrows. Granted, this is the last of the arrow set we've gotten and the entire game's dungeon prize set has revolved around the bow (hmm...) but we still have plenty that we need to do in Termina, and the Light Arrows just make things easier to do; so they've gained a lot of use in all reality (in contrast to prior titles with Silver/Light Arrows in which they were your prize just before the final battle, so that was your only use for them.)
One of the interesting things about this temple is that while the others focused on the use of one of Link's forms in order to get around, as this is the last temple before our final showdown; you have to make skillful use of all of your forms and instead of a song which allows you to access the temple itself, this song does that but in a different way: the Elegy of Emptiness, instead of just opening a door, allows Link to make copies of himself which allows for more complex switch puzzles. Granted, this is the only way to open the door to the Stone Tower but it is a rather unique presentation of a transportation song.
The King of Ikana has bid us to rid the evil from the Stone Tower, as the reason they are cursed is all in there. Wow, the Skull Kid has really brought a lot of evil upon this land, I wonder what his beef is (I actually don't, but I won't spoil it yet.) We even get to have a showdown with the King, which is cool...good guys fighting each other, that never happens in a Zelda game!
Either way, after exploring this temple thoroughly and getting an awesome upgrade (the strongest sword in the game) we encounter Twinmold, an evil pair of sand worms? Okay, that sounds kind of Final Fantasy to me! Either way, we become a giant to face them (we may as well, as this is the only room in the game the mask works in. I understand that based on the programming, but on a pragmatic stance it isn't explained, which leaves me feeling empty.) This is the easiest boss in the game. As you go through the game, the bosses actually start with the most difficult and end with the easiest, but this can be blamed on preparedness, experience and stamina. However, were I to face Twinmold as a three-heart weakling, I'd still have better luck than I did against Odwala as the same. Admittedly, simply because of the concept of the arena he's in, Gyorg is the hardest of the four underbosses.
However, all that being said, we've now freed all four giants...we just have to collect a few random heart pieces and then we'll be taking care of that moon that's about to crash into Termina! (That thanks to the Song of Time, we've avoided that occurence several times now...yay!)
Sunday, October 31, 2010
To Ikana!
This is the first time, I have ever made it this far in the game because the game frankly irritated me with its difficulty level to this point that I never cared up to this point. But following the deeper storyline this time; Ikana is definitely the coolest places in the game and if they had wanted to improve this game any, you would have freed Ikana from its curse earlier in the game than the other areas which involved some quite stereotypical missions (rescuing a princess, thawing a landscape and avenging a lost musical soul).
Ikana Valley is where the game truly takes its own, unique form and makes Majora's Mask as its stand in its own light, independent of Ocarina of Time, without too much frustration. Although the puzzle factor in this part of the game is still high (this whole game is centered around puzzle rather than action) it is fun to unravel the mysteries in this valley and learn about a lost kingdom within the game itself, adding more flavor to what is beyond Hyrule; this kingdom even sounds like a cool kingdom to base a whole independent Zelda in.
You start out not having any way in until you can best the Gorman brothers at racing (these two idiots look like Ingo from Ocarina of Time and act like him too...not a good synergy). Either way, this mask makes us look like a ninja and makes ninja warrior appear to do battle with us, and give us hints along our way in this last leg of our journey. They are mostly pretty cryptic, but they all point towards the fact that something happened to Ikana, though it was once a great nation, it seems...but a curse (via the Majora's Mask) has made all who enter this kingdom riddled with death.
This game gets very emotional, and it's very good in that regard; it makes you the player react not only to what is happening to Link, but to what is happening around him. I love this part of the game, I wish there was a way to skip a lot of the other stuff to get here earlier.
Either way; now that we have access to Ikana we can also complete the longest side-quest in the game; which is highly evocative but highly irritating in its timing and length. Everything has a certain time of day by which it must be completed, the whole thing takes a three-day cycle, and it has two rewards: but you can only get one of the rewards per setting, meaning you have to do this lengthy exchange twice! This is where we reunite Anju, the inkeeper, and Kafei, her fiance cursed to look like a boy. Though physically incompatible, their love overcomes all, sending a strong emotional undertone throughout the game which prevades the darkness of the overall plot. Lovely!
Thursday, October 28, 2010
The Mystery of Great Bay
So the next stop on our journey is the western section of Termina, which is a giant ocean surrounded by elegant seashore. This can only mean one thing: a water-based dungeon. Celebrate, right? Well, not really. Here we meet the Gerudo, who are portrayed in Termina as nothing but ruthless pirates. They were much cooler in Ocarina of Time when they had an entire civilization built around history and culture; these Gerudo are nothing but bandits. Either way, on the beech we meet the dying Mikau, a zora guitarrist who needs us to complete what he could not in life. It seems that his girlfriend's eggs were stolen by these pirates and that they are quintessential for without them, she has lost her ability to speak. So a little sleuthing around (made far easier by a mask in this game that makes it so others don't notice you) and we are taught the next song in the game. We also get to meet Mikau's gang, and by far, Zora Link is the coolest form that he gets: he's strong, he's tall, and he's the easiest on the eyes too, to be a bit shallow. What sucks about Zora Link is swimming...swimming is hard.
So all that aside, we explore a bit more for some more items and stuff and then we'll head into the temple. This temple is, by far, the hardest of the game, accompanied by the hardest boss battle you have to deal with to boot. You have to do a lot of backtracking, and to make it worse, the temple's hub room isn't all that easy to understand with hallways going this-way and that, often leading you to frustration. The goal of the temple is simple: adjust the water flow as you go so that you can access each area of the dungeon, one at a time. This is harder than it sounds, though.
Did I also mention that Gyorg is an absolute terror? This beastly fish fights you underwater and if you go down to the depths to fight him, you're a goner. He does an insane amount of damage, and he seems to be able to snag you in those jaws of his more often than seems necessary. The goal is to stun the boss, then wreak havok on him. Well, easy enough, except that to dive down to him, strike him, and then swim the hell away before he gets to chomp down on your flesh is the difficult part. Luckily the boss doesn't have an overabundance of stamina and he quickly surrenders his remains and a heart container. The seas are cleared, and we're on our way!
Sunday, October 24, 2010
Snowfall
The snowfall temple is one of the more interesting of this game's dungeons. Situated within the great mountain that the Goron race calls home (recall the fire temple, anyone) this temple is encased in ice. Apparently the goron race doesn't like ice, so this is the form of malice that has decided to befall them. Either way, up here in the mountains we assume our second transformation: the goron. This form is by far the strongest fighter if not the clumsiest looking. It's difficult to control goron link as he rolls around, but this gets easier.
The most important thing is after the temple's boss, a giant mechanical goat (ghot, lol) is defeated, the winter outside thaws and we have access to the entire mountain which allows us to sharpen our sword to the gilded sword which tremendously will help from here on out (this sword is unbreakable, transcends time/space and contains three times the attack power and twice the reach of the kokori sword which was just as lame as it was in Ocarina of Time. Link is now capable of surviving.)
The most important thing is after the temple's boss, a giant mechanical goat (ghot, lol) is defeated, the winter outside thaws and we have access to the entire mountain which allows us to sharpen our sword to the gilded sword which tremendously will help from here on out (this sword is unbreakable, transcends time/space and contains three times the attack power and twice the reach of the kokori sword which was just as lame as it was in Ocarina of Time. Link is now capable of surviving.)
Wednesday, October 20, 2010
Woodfall Temple
All right, here we go. This is the game's first dungeon, and right away the difficulty level of this game becomes apparent. Granted, this is no Link's Adventure but it certainly ranks up there with it. Not only are you now timed (you can't take your time thinking on puzzles or trying to subdue the boss) but the puzzles are difficult right from the very beginning. While this dungeon is relatively short, there's a lot to do: we have to collect a bunch of stray fairies in order to gain more power, gain a new weapon (we get the Hero's Bow right away in this game, a definite plus) and unlock the mysteries one by one of the Woodfall Temple without falling victim to the poison water.
Puzzles now make use of masks as well as standard items in order to solve them, so it really takes some brain power to wrap yourself around this game. However, it is a fun new dimension as Link takes on new forms.
This boss, however (Odwala) is an extreme annoyance. He's virtually invincible and a powerful summoner with a longsword. Someone was feeling sadistic at Nintendo. Not only that, but Tatl all but tells you that you'll be dead if you get too close...which is the only way you're going to injure the thing. Go figure. As with virtually every dungeon in the series, you use the item you found within to combat the boss, and this is no different: arrows work from a safe distance to stun him so you can get in close with sword strikes. However, this boss makes a clear statement: action isn't lacking in this game either, you will be entertained.
After we're done with this yahoo, we find the Deku Princess who is another snot (there is a theme with princesses in the series, too, right? I guess like bride's maids to a bride, these princesses make Zelda seem all the more graceful and wise...although Zelda isn't in this title except for in a flashback in the very beginning.) Oh well, we cart her off (using a bottle, hehe, that's a bit unrealistic but at the same time, explains things a bit better than the girl simply following Link when she really can't) and she gives her father hell for making a rash decision in labeling her companion monkey a kidnapper. Whoo, another crisis averted!
Monday, October 18, 2010
The Swamp
So you'd think that at this point this game starts to do something to drag you into it. Not really...only little tiny pieces of the plot have been exposed thus far (while in Ocarina of Time, the plot was thrown in your face from the beginning and never left you alone thereafter.) We journey into the woods (something I've noticed is that the Zelda series likes to put a woodland theme around its first dungeon.) These woods surround a swamp which has been polluted by some evil spirit...hmm, sound familiar? Sounds like what Ganondorf did to Hyrule, the Skull Kid is trying to do to Termina. Except that you get a nice, teary scene on your way that shows you that the Skull Kid himself wasn't a bad guy...just a trickster of sorts who was turned into the menacing villain you met in the Lost Woods.
Here, you find that the Deku (lovely creatures they are) are in charge of this region of Termina and they don't like the other races at all (what a coincidence, none of the humans in Termina like them either! Karma sucks, don't it.) So anyway, we have to pull a stunt similar to that in Ocarina of Time: we have to sneak through the palace garden a few times in order to find out that the Deku Princess and a young monkey went into the Woodfall temple to find out what was going on and the Princess was captured by an evil monster who lives inside. So now we know our mission...let's to it! Just have to sneak around again and through the woods to find that temple that only the Deku are allowed into...strange times we're living in!
Here, you find that the Deku (lovely creatures they are) are in charge of this region of Termina and they don't like the other races at all (what a coincidence, none of the humans in Termina like them either! Karma sucks, don't it.) So anyway, we have to pull a stunt similar to that in Ocarina of Time: we have to sneak through the palace garden a few times in order to find out that the Deku Princess and a young monkey went into the Woodfall temple to find out what was going on and the Princess was captured by an evil monster who lives inside. So now we know our mission...let's to it! Just have to sneak around again and through the woods to find that temple that only the Deku are allowed into...strange times we're living in!
Welcome to Termina
So Link finds himself in the land of Termina, doomed to perish under the weight of its own moon in a matter of seventy-two hours. The unfortunate events keep piling on top of us, don't they? Either way, a character we could have done without his return, the Happy Mask Salesman, has come to Termina to stalk us. The game begins by taking away our humanoid form and makes us a deku scrub with no other option (hey, thanks...sarcasm is not sold seperately. when I first played through this game, this in of itself made me detest the game.) I mean, seriously, do you want your players to detest you from the start of the game? I'd have switched the orders of the forms a bit so that you get a useful form, the suckish form, and then finally the coolest form...whereas this game goes from suckish to nice to awesome (and nice and awesome are able to alternate into a humanoid). Well, the first part of the game is designed to introduce us to the doomsday element of the game by making us stay around for the three-day cycle in order to gain access to the Skull Kid's chamber (after a series of errands, of course...we need to be productive while letting time fly. there's plenty to do in Clock Town, after all). Here we gain magic power (Deku Link's victory pose at this is humorous), become a member of a top secret organization (kind of) and ascertain a useful item or two. What makes this game hard is it plants you in a non-Hylian world (so there's nothing familiar for you) off the bat and doesn't give you much direction - you must make most of the decisions yourself (unlike most Zeldas, where the game leads you to where you need to go next via plot or an irritating fairy), and you must make them quickly because while the game has 72 hours, each hour translates to about a real-world minute.
Speaking of fairies, this time around instead of Navi (who I think was awesome, even if she did shout "Hey!" all the time, she was an awesome companion for Ocarina of Time's Link) you have Tatl, a fairy who is seperated from her brother and I suppose "master" the Skull Kid. You think they'd have difficulty topping Navi's "Hey!" but no. This little bugger has a bell. While she isn't as demanding that you pay attention to her, she's still pretty bad. Still kind of helpful (I think Navi was more helpful, but still cryptic enough not to give everything away) she's actually a major plot element in contrast to her previous element, who served only as a side-kick, really. (Zelda's role was far more crux in Ocarina of Time than Navi's).
So our first mission is to get the Ocarina of Time back so that we can SAVE. This also turns me off to this game right off because you have to keep playing unless you want to start the whole thing from the very beginning. The Song of Time is the only way to save, and when you do, everything that's numerical, you lose it. Well, that's another great feature isn't it? Yes, it makes sense given the nature of temporal laws. But I digress.
Sunday, October 17, 2010
A Series of Unfortuate Events
The beginning of this game is by far, the most cryptic and dark of any Zelda title. Link is searching for his long-lost childhood friend, and is accosted on the way by, in no less words, thieves, who steal the Ocarina of Time. Link's not the type to take anything sitting down, though, so he gives chase to these bandits (one odd fellow in a mask and two fairy folk, I guess not all of the fairies are good-aligned) and eventually confronts them, only to find himself transformed into a Deku Scrub (dear me, two minutes into the game and my horse and ocarina are stolen from me AND I lose my human form?)
After a bit of traveling in what can only be described as an underworld (this place bothers me because its so vast that instinct tells something must be hidden in it, and you don't get to revisit this place) you find yourself in the basement of some sort of tower with gears everywhere. On top of that, the guy from the Happy Mask Shop in our previous title is here to pity us and tell us that if we do for him, he'll do for us (oh, isn't that so nice how these NPCs are so subtle about using Link to get their errands done!)
All this aside, a cryptic beginning marks an incredibly cryptic game, and as you open the doors to find the world you've been sent into, you will also find yourself locked into the lovely three-day cycle of time this game calls home.
Saturday, October 16, 2010
Majora's Mask
Another adventure is done; so let us set off on Majora's Mask. The plot of this game is simple enough (or so it seems:) Link is searching for a long lost friend (we assume this to be Navi, thanks to the ending scene of Ocarina of Time) and we also know that this is the same Link from Ocarina of Time, only a few years older. (So THIS is what he did between 10 and 17...) Somehow, he ends up in Termina, a land which is doomed to perish under the weight of its own moon which, by unexplianed forces (explained to us through the course of the game) is being pulled towards the city.
This is, by far, the oddest, weirdest, strangest game in the entire series. With the exception of Zelda II, this is the only direct sequel of another title in the series as well (the next one won't come out until the cel-shade titles appear many years later.)
So let's get started! This game looks very similar to Ocarina of Time in its graphics style, but from the very first cameo, you know that you aren't playing the same game. At all.
Review Master Quest
Master Quest is just a spin-off of Ocarina of Time; however, it offers a lot of challenging aspects as a lot of the puzzle parts to the game are made more difficult (if the action isn't toned down a little, at least I think so.) The major plus of this game is that it takes a game which already had great replay value and made it a little novel so as to expand upon that replay value. It plays and feels like a different game from the beginning while still leaving the player feeling nostalgic for the original title.
It's kind of heartwarming, as well as amazing, to think of how quickly this series has developed. Ocarina of Time is a relatively early title in the series and yet it is leaps and bounds ahead of its predescesors, some will argue that its successors don't live up to it. I don't, I enjoy the games that follow, but I will maintain that this game set a very high standard not only for the series itself but for the gaming industry period...a standard that has yet, really, to be supplanted in mind or heart.
The last scene of this game, though, always leaves me wondering: does Zelda recognize Link? It is inferred that she does not (which is sad) however, I like to think that she does however, she's wise enough not to let on that she does (although, if you think about, Zelda says when she first meets you that you seem familiar to her...perhaps this can all be explained through temporal anomaly?)
Speaking of temporal anomaly...one happens in Master Quest that didn't in Ocarina of Time. In the Spirit Temple, to solve one of the puzzles, you must activate a switch that you cannot as a child, but you cannot reap the rewards as an adult...so you return as a child (your past) but even though the switch is not activated until you're an adult (your future) the chest is still there. Huzzah. Guess they didn't think that one through all the way.
All in all though...
Master Quest Final Grade: A
Thursday, September 23, 2010
Review Ocarina of Time
The Ocarina of Time is a masterpiece, hands down. This game offers a deep storyline, excellent, innovative graphics, a plethora of items and dungeons to explore and even more side-quests to do along the way, there is so much to do in this game to get a 100% walkthrough, and it's all fun (despite sometimes being a little frustrating).
Final Grade: A+
Final Grade: A+
The End
Before we can go to Ganon's Castle, we must first speak with...Shiek? Shiek discloses her identity as Princess Zelda; something that was rather obvious from the first time we met her. She then discloses a bunch of information about the past, and after her reminiscing is over, she entrusts the Light Arrows into your care, sacred arrows which are always the last item you get in any game. They are awesome in that they defeat any enemy in one hit, they suck in that they consume a good deal of magic and that they are the second-to-last item you get, so it doesn't help you through any of the game's dungeons except the last one, which is easy anyway.
But just after she does this, she gets captured...revealing herself to us, she also revealed herself to the evil king and he now claims that he will claim all of the triforces. Yeah, right, again. He says that his only mistake was to underestimate us (then corrects himself, he underestimated the Triforce of Courage). So now we know the trinity for sure...Link - Courage, Zelda - Wisdom, Ganon - Power. And the Triforce split because Ganon was not of a righteous mind, its other pieces found protectors of themselves, in order to protect balance in the land. Good explination, I guess.
So it's off to Ganon's Tower! The sages make a bridge for us in a very, VERY pretty cutscene and implore us to save Zelda, the Sage of Time, who is destined to lead them to seal Ganon in the Evil Realm...but this is the EASIEST dungeon ever, so no worries. The first part involves Link going down six halls, one for each of the elements, and dispelling the parts to the barrier that prevent him access to the keep itself. All of these puzzles are easily done, and in here, we get the Gold Gauntlets (just a small improvement on the Silver Guantlets, probably to make sure we couldn't do these things BEFORE we got here). A quick excursion outside nets us double defense, which is the game's last upgrade...at this point, I now have every item, every skulltulla and every upgrade the game has to offer! Woohoo! No point in waiting now, then!
The tower is just a series of rooms with action sequences, and once Link is done beating them, he simply climbs the stairs. No choices, no nothing. Just up.
At the top of these stairs is Ganondorf, the King of Thieves. He goes on a long tirade about his ambitions and how you stand in his way. (Yay, thanks.) And you know what THAT means, don't you?
The fight with Ganondorf is relatively challenging, but not overly difficult. All you have to do is play ricochet with the King and then shoot a light arrow at him, proceeding to use the stun opportunity to slash him. (Seems the key in boss fights is creating an opportunity to attack...whether that be through creating an opportunity itself or stunning your opponent, whatever works.) The trick here is though, that Navi can't target him...he's using dark energy, which she complains about and can't help you. It's not too difficult to get a shot off, you just don't have much time to do it.
After awhile of this, Ganondorf starts to cackle and the tower begins to crumble. You and Zelda are then standing there, and she informs you that the tower is collapsing, so let's get the hell out of here! You have a limited amount of time to descend the entire tower, following Zelda so that she can open all the doors for you (you know, those grates had to be for something!) This is really no problem, you only get into a fight once and as long as you keep up with Zelda, you'll make it with time to spare.
At the bottom, Zelda complains about hearing a noise...and then Ganon shows his true form, knocking the Master Sword away! He's a dual-wielding beast with only one weak point: his tail. This phase is simple as well: side-dodging and light arrows to the face work nicely, coupled with jump attacks to his tail. Either way, the King of Evil is getting pissy that you're beating him, and when you take out the Master Sword, Zelda finally decides that it's time to help, holding him down, urging you to finish it.
In the most awesome cinematic yet for the final boss of a Zelda game, Link delivers several slashes to Ganon's forehead (with green...blood...flying everywhere) and finishes by piercing the demon with the blade, seemingly ending his life. The end of the game is imminent. The sages get to work and seal the evil king away. Yay! We win! As he descends into his dark prison, though, Ganondorf laughs at you, for as long as he has the Triforce of Power, he will be alive, and he will be back for his revenge on you and Zelda, and will seek it against your descendents as well...mmhm...
This, in this moment, is how the legend was born!
The ending of this game is happy and sad. The first part of it is very sad...Zelda and Link say good-bye, and they both know that they will not see each other again. Zelda laments for the pain she has caused Link, and to atone for it, promises to send him to his proper time so he may live his life, but with the flow of time working the way it does, this means that though Hyrule is safe, no one will ever know of his actions in saving it; and all will be remiss. A very sad, but metaphorical ending.
But we end on a happy note...there's a gathering of people in Hyrule Field, celebrating the new found peace...and high on Death Mountain, you see a scene of the sages, which is quite cute...with Saria on Darunia's shoulders and such, overlooking the new world that has been carved of their seal. Then on a sadder note, Link visits Zelda once more in the proper time, but she doesn't recognize him...tear.
So ends The Legend of Zelda: Ocarina of Time.
Spirit Temple
The last of the game's real dungeons, there are two halves to this dungeon (and adult link quickly discovers he'll have to come back here in his past to do anything...) the first being in his childhood, the second in his adulthood. The structure of this dungeon is built around this theme, with two wings leading into a central hub room which leads into the boss room. Each wing is designed for the one part of Link's time period.
In Link's childhood, we have to face a good many enemies that would be nice if we had our adult weaponry to face them with, but alas, we are back to the Kokori Sword and other little kid weapons. The puzzles here are nothing the mind can't handle, but they're starting to get a little more hairy...the days of the legend puzzles, though, are behind us. The hardest puzzles of this game are found in the Water Temple, and the silver rupee puzzles that are prevalent in this dungeon as well as those involving light just don't compare in difficulty.
At the end of Child Link's venture through the Spirit Temple, he finds an Iron Knuckle. These enemies haven't made an apperance yet and don't make many appereances in this title. They are hated in every title before (in Zelda II, they were the staple enemy used to irritate the player) and they are no real exception here...but thanks to a new spell that we got just outside of this temple, he's no problem...Nyaru's Love makes these guys a piece of cake. All you do is make yourself invulnerable and then attack away, dodging as best you can. Eventually the soldier falls, revealing the way to the Silver Guantles...which he can't even put on! What a gip! But alas, there's Nabooru, the chick we met at the beginning of this temple, who told us to go in and find these treasures for her. She's been captured by Ganondorf's minions. Well, to the future to rescue her, right?
Adult Link finds the silver guantlets a nice fit, and ventures forward where he couldn't before. Adult Link's half of the temple is geared more towards puzzle than action, and the Iron Knuckle that he must face is even more of a chump with the Biggoron Sword in hand. He'll find the Mirror Shield in these confines, allowing him to complete the light puzzles within this dungeon. You'll make your way from there, quite quickly, to the boss chamber of the dungeon.
Twinrova is an entertaining, easy but most of all unique boss. You fight her using sword and shield, but mostly, you will fight her using the shield. The goal is to reflect spells back at your enemy (in both phases, though it differs how they are effective in both phases) and then in the second phases, after stunning them with an elemental blast, slashing them to pieces. Also, the second form of Twinrova, though she is formed of two old hags, is some kind of enchantress. These two calls us "stupid for coming all this way to be a sacrifice to Ganondorf." Yeah, right.
Once they die, you get an entertaining cameo, where the two of them squabble about their age as they float to heaven...really? Either way, you are transported to the chamber of the sages to meet the awakened Nabooru, who is safe from harm, and is the Spirit Sage. She entrusts the Spirit Medallion, the final one, into your care. All right, that's all there is to it, right? Onto the Temple of Time...well, the game does deposit us there anyway...
Master Quest: Remember how I was complaining about how all of the dungeons are relatively unchanged, and the past few dungeons may have even been toned down? Not this one. You really have to use your puzzle-solving skill to get through this completely re-vamped dungeon; and it's no cake-wake, involving time-travel, precision and some intense action that the original did not have. The Spirit Temple has succeeded where the Shadow, Water and Fire Temple failed: so I guess only this and the Forest Temple are really "masterful."
Storming the Gerudo Fortress
This part of the game is awesome, if only for the fact that the music in Gerudo Valley is awesome. This is also the only real part of the game where we are required to use stealth. See, the carpenter here is complaining that his workers went off the fortress and got themselves captured (well, serves them right, doesn't it?) and he wants us to help them. Of course he does...well, we end up getting captured even trying to get near the collossal structure, and we need to sneak around the place like a thief ourselves in order to find and save four carpenters so the bridge can be built and more importantly, so that the Gerudo can show us some respect. This is one of the harder parts of the game because this structure is very complex and very easy to get lost in...and getting lost when there are guards who will arrest you on sight isn't exactly a good scenario.
After we've done this, though, we can enter two new domains: the archery contest and the training grounds. I go for the training grounds first, which involve a series of relatively simple puzzles in order to get keys. After getting seven of those keys (which is all we can get, we haven't been to the Spirit Temple and can't explore the whole thing) we go through a maze of locked doors and find our way to the Ice Arrows...an item which serves us no real game-advancing purpose, but they're still pretty cool.
On the other hand, the archery contest is a major pain in the butt! You need to get a score of 1000 and then another score of 1500 on horseback knocking down targets which consist of jars and a few stand-alone bullseyes. This is one of the hardest feats in the game because Epona rides fast, and getting a straight shot on horseback is hard. My strategy was to divide the course based on what I needed: use seven arrows on the jars, two on each end target, leaving three arrows each for the big targets by the jars. The passes? On the first pass, hit the jars and try to hit two shots on the last big target. Then, on the second pass, get the rest of your shots in a more calm fashion. It took me so many tries to finally get this...but the reward? A heart piece and the biggest quiver! Well worth it, I must say.
Shadow Temple
The Shadow Temple involves two parts...you must travel back to your childhood and obtain an item from a mini-dungeon in order to advance in the Shadow Temple itself in your adulthood. This same concept is copied into the Spirit Temple, though it's different there in that the Temple itself hosts both items for both time periods.
Let me start by saying that, though the Water Temple I despise for its difficulty, the Shadow Temple I despise because it's outright creepy! The walls talk to you, guillotines are everywhere and there are scythes and spikes everywhere looking to make Link stew. Not to mention bottomless pits and invisible walls and floors. This, coupled with the presence of wall and floor masters, makes this level disgusting.
But first, as a child, we must visit the Bottom of the Well by playing the Song of Storms for the windmill manager. (Another contingency of time: we played the song here as a child, and the manager teaches us this song as an adult because he never forgot the medley we played that made the windmill screwy, but in the sequence of the game's events, we learn the song BEFORE we screw up the windmil in order to explore the well). This is the easiest mini-dungeon ever, even easier than the Ice Cavern. Situated around a main room, Link's goal is to explore around several invisible walls and floors and find the Lens of Truth, which then lets him discover a few hidden Gold Skulltullas.
Traveling to our future, the Shadow Temple doesn't offer any really hard puzzles (the Lens of Truth pretty much does all of our guess work for us) and we quickly get the Hover Boots, a set of boots which really only serve to get us from Point A to Point B in certain scenarios. A heavily limited item, as no one would want to use them in regular battle (they have absolutely NO traction, the game isn't kidding when it tells you this to describe them).
The boss of the Shadow Temple follows along with the "evil spirits not put to rest" theme that flows through the entire Shadow Temple. After all, Shadow isn't necessarily evil, as an element, it is simply souls that are not at rest and in their disturbed nature, torment the living! His name, though, is hilarious. Bongo Bongo. And, with the Lens of Truth, he is exceedingly easy! This is the first, and the only, boss which you do NOT need (and shouldn't) to use the dungeon's treasure. The Lens of Truth is the treasure of the Bottom of the Well, even though it is linked to the Shadow Temple, it really doesn't count. All you simply need to do is use the bow to stun him, then slash like mad. The only difficult part of thing in this is that you can't see your enemy. But that doesn't really make this fight much of a challenge.
Master Quest: Like the other adult dungeons, Shadow Temple isn't any harder in this new version. I was expecting more of a challenge, and only really got one in childhood. Some of the adult dungeons seem almost tame; of course this could be my experience with the series, the game itself and its original version. So maybe to others all of these dungeons are impossible to figure out; I don't know, seems I'm having a much easier time with Master Quest than I did with Ocarina of Time.
Water Temple
Here it is folks. My entry for the most hated temple in all of Zelda-lore. No other dungeon, in any other Zelda game, commands more ownership of hatred, fear and other assorted negative emotions. It is filled with dangerous enemies, one hell of a mini-boss fight, one hell of a boss fight, and puzzles that make you walk on egg-shells...complete them in the wrong order and you'll get stuck, and it's back to the start so you can restart the entire temple (which is NOT fun, trust me). Here you meet Ruto, the Water Sage, who seems more than eager to help you, but at least she has her priority straight...she's doing it to help her people, not to help herself to you (she's not the only one, several other females in the game throw themselves at you, namely the Ghost Shop owner and Nabooru).
Either way, this temple is universally recognized as the most hated dungeon of all time, and you know what? I totally agree. I despise it. You have to really take your time, think about what you're doing, and the enemies here are mostly fought underwater, which means Hookshot only (which as a weapon sucks). Other games will allow you to use your sword underwater, but not here so we have to make with what we have. This temple is filled with interested puzzles and mazes, leading up to an epic mini-boss fight with...YOURSELF!
In the water temple, you are forced to duel yourself. Dark Link matches every sword stroke, every move you make, equally. He's more annoying than he was in Zelda II, and he was pretty annoying then (as the final boss of that game, too). However, there's a simple trick to beating him: see, Dark Link copies every move we make. But he can't copy anything we do with the Megaton Hammer since for some reason, he was programmed without one. Evidentally our shadow only thinks sword and shield are necessary...his loss, because this makes the fight devestatingly easy, and the shadow falls into the mysterious pond below you, and you get this dungeon's prize...the Longshot. How original, an item that we've already gotten, just with superior range. How nice.
The key to navigating this dungeon are three switches, which control the water level. It's a hassle trying to navigate between these, especially if you don't know what you're doing, as in order to do what you need to do the water level needs to be appropriate, and you can't really know what's next in your progression unless the water level is appropriate. A good challenge, indeed. I definitely liked this aspect to the temple, added something unique and challenging.
The final room of the Water Temple holds Morpha, an odd amaeboa that is arguably the toughest boss of this game (and by that I mean, I would argue for that). This boss deals a great amount of damage per hit, is difficult to lure out of hiding (it lives in the water and you need to get it OUT of the water to hurt it...with the Longshot this is possible, but the Longshot is such a pissy weapon when it comes to launching consistently) and your opportunity to attack once you've dragged Morpha out of the pool is extremely limited. But that's why we got the Biggorn Sword before coming here...it knocks out half of the amount of sword swipes we need.
Master Quest: So what exactly happened to the Water Temple's ominous presence? This Water Temple's puzzle value is actually a little easier than the original's, and the action is extremely limited (they took the shell blades completely out of the picture, and while they added a few enemies here and there, there are hardly any to speak of.) Ah well, what can you do, right? I suppose that this would be a tough dungeon to improve upon...the original Water Temple was a great time sink.
Ice Cavern
Before we head to the next temple we need to head up to Zora's Domain and get a few things up there. First thing one might notice about Zora's Domain is that the entire area is frozen beneath ice. One of the saddest things in the Ocarina of Time story, the Zora (much like the Gorons) opposed Ganondorf when he ascended to power. With the Gorons, he made preparations to feed them to the sinister fire dragon Volvalgia; a plot which we thwarted in the Fire Temple. Here, we find the entire Zora race is encased in ice, with King Zora trapped in some kind of magical ice. Apparently Ganondorf wasn't so thrilled by their resistance. But luckily for us, this maneuver allows us to get into the caverns behind Jabu-Jabu's fountain. (By the way...where IS Jabu-Jabu? This is a question the game never directly answers...has he fallen victim to Ganondorf's evil designs, much as the Deku Tree did?)
The prize inside (hehe) are the Iron Boots. These boots help you in many ways, and are the first pair of footwear you get that you didn't come with. They let you sink in water and make you heavy, which will become essential for a few puzzles later on in the game (these boots really are only necessary in the Water and Shadow Temples and Ganon's Tower, but that's good enough for me!)
So now that we have some more goodies (a few heart pieces on the way, of course) let's head out for the Water Temple in Lake Hylia! If Ganondorf hadn't frozen Zora's Domain, it'd be a lot easier, but we have to travel clear across the entire continent...
Fire Temple
The Fire Temple may be the simplest of the dungeons adult Link faces. Straightforward and with minimal action, nothing about this temple screams "difficult." Not to mention, and I will say this over and over again (and is part of the reason why for most of the remainder of the quest, he's going to wear it) Link is smoking hot wearing the Goron Tunic (red's definitely his color!).
This dungeon has an interesting layout: from the very first room, you can see the boss' chamber, and Darunia, the fire sage, greets you (somehow he manages to enter the boss' chamber without a key or anything...he's got skills). The entire dungeon is focused around this beginning room, and your goal is to make it possible for you to traverse the gap by exploring the rooms around, below and above this one.
The prize for this dungeon is the Megaton Hammer. In reality, this item only comes in useful in this dungeon and in a few other places (and in one key fight in the next temple). So I don't really like it too much (some have cited it as a good alternative weapon to the Master Sword, but the sword itself is just as powerful...)
The boss here is Volvalgia. While he has a simple strategy (like whack-a-mole, but with a dragon) this boss is the toughest one that we've faced yet. He does a great deal of damage to us, his fire attacks are a pain in the butt to avoid and not to mention he enjoys rough-housing the ceiling. Not to mention the way he looks, this thing is more like a fire snake than a dragon, and it also looks like it's having a bad hair day too! Either way, smashing its face in and slashing away it proves true, and then the Fire Medallion is ours.
Another aside - the Bolero of Fire, the warp song for this area, is one of the best sounding warp songs by far. It makes me wish we had to use it more (but alas, we only really need to use it once or twice).
Darunia is awakened as a sage, and acknowledges you as his full "brother." That's pretty cool, the Gorons are completely on our side now! Darunia pretty much has the biggest heart of the sages, and he's the most child-like too (with the exception, maybe, of Saria). After some words of wisdom and thanking you graciously, we are encouraged to go on with our journey...we're no where near the end yet!
Master Quest - The Fire Temple was simple and straightforward in the original title and in the bonus, it could be considered even easier: the puzzles are more straightforward, the game offers you a few cop-outs and the action level is definitely toned down. I have a bad feeling about this given that the water temple is coming up soon, but we shall see. (I figured this ease out by the fact that you receive the Megaton Hammer very early in this version of the dungeon.)
Monday, September 20, 2010
Forest Temple
So the Forest Temple is where the game starts to get challenging. This dungeon focuses around a primary room, which we must constantly revisit in an attempt to go down a floor for our big fight. The theme here is evil spirits, as the temple is beset by ghostly foes called poes, which pose puzzles for Link now that he has the almighty Fairy Bow in his posession. Other such redead enemies appear along with a few, forest themed ones which are pretty ho-hum. While the game has finally given us our first tastes of real puzzles (for instance, there are hallways here which lead to two rooms depending on which way it "twists"), it's nothing that we can't handle. In the thick of things it seems impossible and irritating, of course, but afterwards, you always think to yourself, wow that was nothing! Yeah, right.
Anyway, the boss of the Forest Temple is a phantom of Ganon himself, but is nothing compared to the real thing (hey, even it admits to its shortcomings as a cheap imitation). While a bit of a challenge, and this is the first real boss that really has the power to kill us (despite our augmented life capacity). But he's not too big of a deal, it's a really cool fight as well. Completing the Biggoron Sword sidequest before this dungeon, however, helped everything a great deal. (That sidequest is really not that big of a deal...you just have to know where you're going and have good luck with Epona!)
So either way, we discover that Saria, our childhood friend, is the sage of the Forest Temple. She doesn't really recognize us now that we are big and strong (too bad) but she does sense something familiar about us...and thanks us for our courage anywho. This is kind of sad that Link is spending all this time saving Hyrule, and no one will ever really recognize that it was him who did it because of the paradox of time. But now her power is added to our own and we're better than ever, especially with a bow in our hands!
First thing I did with the bow is I went out to Hyrule Field and took care of all the Big Poes. It's really probably the easiest long side-quest there is in Ocarina of Time, if you can time your shots with the bow well.
Master Quest - As with the childhood dungeons; the layout of this dungeon is very similar to that of the previous, the action level is (much) less severe, and while the puzzles retain the same theme they could be considered slightly more challenging...in all reality, I just think this was flipped a little bit, the only thought was in figuring out what was different and where.
Saturday, September 18, 2010
Errands Here and There
The first thing Link realizes is that adults run errands. More than children do. What do I mean? You'll soon see. Our first stop is the new Lon Lon Ranch, which is now under Ingo's management. That was a bad idea...I think I might need to contact the corporation about that decision and raze them! What drunk human resources manager put him in charge? Seriously, this guy just irritates you (his eyebrows and his evil eyes) and the things he says makes you just want to slice through him with the Master Sword, even if you are good-aligned.
Regardless, it is easy to dupe this loser, and after a bit of coaxing and he bets Epona on a race (after all, he doesn't want Ganondorf to know that he lost a race to you...why you, I don't know...after all, does Ganondorf really know who we are yet, though he does a little, does Ingo know about that relationship? I doubt it). This meltdown causes him to lose the horse. Awwe. And while he "honorably" gives us the horse, he then informs us that we are trapped in the ranch. Um...horses jump fences, moron. So we're on our way to our errands.
The first thing I do when becoming Adult Link is get the Biggoron Sword out of the way. This weapon is entirely optional, however it is so useful for defeating bosses that I can never pass it up and since the entire quest can be completed immediately upon getting Epona, why not, right?
This quest is just like the Happy Mask one, in which you gather various items and trade them for new ones to find the next one in the succession until you finally have the Sword. This one is different in that you are often timed, and you have to help others out often with the items you are trading back and forth. Well, that seems to be the theme of saving Hyrule is saving people often involves running errands for them that they're too lazy to do themselves. Either way, this side quest is a lot of fun and adds a new dimension to the game which we must complete. While not difficult, the labors involved add more playtime to the game. Yay!
All our errands out of the way, oh yeah, Rauru told us we needed to awaken the sages...then let's go do that, right? Sheik, a mysterious figure, told us that we would find the first one as someone we knew (ironically, all the sages are persons we met in childhood.) So here we go!
Tying Up Loose Ends
We have a few last things we need to do before we can wrap up the first part of the story. Basically, before I enter the Temple of Time, I enjoy completing the Happy Mask trading quest (borrowing the Mask of Truth on a permanent basis), collecting skulltullas and doing a few other things that we can't do in our adulthood. After all, we want to make sure there's nothing loose that we can do now that we can't do then. After all this is done, we head to the Temple of Time...but before we even get there...
In front of the gates to Hyrule Castle we are confronted by Ganondorf for the first time as Zelda makes her escape with Impa. This is an awesome scene as Link totally, and obviously, doesn't know what the hell is going on or what the hell he is doing but he obviously cares about what happens to Zelda as he gets in Ganondorf's way. The villain, being the power-crazed fool he is, shows off, ignoring the Ocarina of Time that was just thrown into the moat behind him (hehe). Now we have all the keys, after doing a little diving.
In the Temple of Time, we hear some of the most awesome music in the game. I love the Song of Time, it's one of my favorites. I do wish the Temple of Time was a dungeon in this game (later in the series, it will be, so I'm not too disappointed). Anyway, we prepare for one of the most awesome cutscenes in the entire game and series: Link pulls the Master Sword from the pedestal. It is not the first time he has done this, but this time, when he does so, he is transported to the Sacred Realm.
Apparently, Link's soul has been kept here in the Sacred Realm (which is the Light Temple) for seven years. Now, he is the hero of legend, capable of weilding the Master Sword and fighting against Ganon. This is what we are told by Rauru, the Sage of Light, and the only awakened sage. It is now our quest (we completed our first one, remember, but it didn't save Hyrule...) to awaken the remaining sages and add their power to our own. Sounds easy enough, right? Yeah, sure.
Dungeon III: Lord Jabu-Jabu's Belly
So we're not really deviating from our standard here: we have a central room (the elevator room) from which all other rooms branch. We do introduce a new element here: we have to defeat certain enemies (tentacles) to advance, and this format of dungeon is seen again in this and other titles (off the top of my head, the Forest Temple in this game and Arbiter's Grounds from Twilight Princess.)
One thing I hate about this temple is that you are "priviliged" to escort Ruto all across the place, and she has a horrible time of keeping up with you...you have to carry her everywhere, and if you lose her, well, somehow, she finds her way quickly back to the beginning so that she can scold you. She's also terribly frightened of the worst things, and worse, this NPC has a terrible crush on Link that she's not afraid to hide...and she's terribly gross. That's transspecies, ewww.
Our prize here is the boomerang (boom) which is the coolest item in nearly every Zelda title. It destroys stuff, it stuns stuff, it's long distance, it doesn't use ammunition and it can hit in an arc: one of the best items by far. Too bad only young link can use it.
But I digress. This dungeon has on of the coolest boss fights yet, with multiple stages and we're fighting a group of ameboae which form together to combat you (a cool concept, after all, a team effort has a better chance than an individual effort. the bad guys are starting to think now). This is also the first boss that has a real chance at killing us: the first two were jokes. Now, while in the moment this kind of thing is frustrating and stressful, it's part of the fun of a game: to be challenged and get our adrenaline going. Also, the boss fight isn't impossible and the boss is kind of pretty to look at, making this cool.
Master Quest - This dungeon changes dramatically in the harder version. While the overall layout of the dungeon changes, the general theme of the dungeon has changed greatly. While the original dungeon centered around eliminating tentacles so that we could advance, this version retains that and only that. The rooms of this dungeon have different enemies than before (with the exception of the bubble-things and the biri that are thematic to the place), Ruto's part is minimized (thank the heavens) as you only need her in two rooms of the dungeon, and apparently Lord Jabu-Jabu has a taste for beef because he's full of cows, which are now the central thematic hub to the puzzles of this dungeon. This dungeon is a little more intense than its counterpart; giving that you encounter some Lizalalfos deep inside this monstrous gut; but the fight with Brinade is still cool looking...and rather simplistic. One weird thing about this dungeon is that it gives you the dungeon map in the first room (rather convenient, and sensible) and it gives you the boomerang rather quickly as well. This dungeon didn't step up much in difficulty (if, in fact, this one didn't step DOWN in difficulty is arguable.)
Friday, September 17, 2010
A Little Here and There...
Let me just say this about Bombchu Bowling...what a waste of time and money! The prizes are great, so that's the only reason you have to play, but otherwise, what a waste! And what stress, too! The game is much like the shooting gallery, a big old pain in the butt.
Either way, not much was done except for giving the kid in the graveyard his wish to be scarier and tying a few more loose ends, we're getting closer and closer to the end of Link's childhood...it comes so soon.
After awhile, we finally do make our way to Zora's Domain, where lo and behold, someone's willing to help us...provided we help them out of their sorry situation first! I wonder if that's ever irritating to Link ; ). This time, too, Lord Jabu-Jabu has swallowed the Princess Ruto and King Zora wants us to save her...immediately. Very well, old man. But you better be coughing up that spiritual stone when we're done!
Dungeon II: Dondongo's Cavern
So all right, this dungeon is just like the last one, only themed in fire instead of wood. The object is to get to the boss room and rid the cave of the dodongo problem, so as the Gorons can feast on their favorite food. All of the rooms, including the boss area, is based off a central hub, and it's Link's purpose to visit all extensions of the hub in order to advance to the boss and put an end to his reign of terror...or something like that! Either way, this dungeon is pretty easy (though the puzzles are starting to become more apparent...this dungeon wasn't as straightforward as the last, but it was fairly close) and King Dodongo is a joke. You are invulnerable from him if you stand close to the lava, and much like the dodongos of previous games, you toss a bomb in his mouth and he's vulnerable. Three jump attacks and he was toast...not very hearty for a boss, ne?
Either way, when we exit this dungeon, Darunia crashes down the mountain, proclaims he likes us, and makes us his sworn brother. Looks like we have a bromance! To make it even more intense, every Goron now aspires for nothing more, it seems, than to be a little more like Link. And all he did was a little favor. I guess when you avert a disaster like hunger people are grateful! Our quest must continue, we can't spend forever wallowing in the glory.
Master Quest Notes - This dungeon is quite a bit different than its original counterpart. While the general layout is quite similar and the rooms in the same general location (though items are not, it takes us far longer to get to the bombs and to open up the first floor); this is really where Master Quest begins to live up to its name and its threat at the title screen (only masters dare enter these dungeons). The puzzles in this dungeon start to demand perfection in their execution, and while some puzzles are very similar (for example, the tower lowered by bombs) the proper execution has changed considerably to make it more irritating and to make the player think more about what he or she has to do (while it is obvious because of playing the game before, success is harder to achieve in these puzzles).
There is a little step-up in the action, as you encounter harder enemies in greater numbers (such as the dodongos and armos knights) but other action sequences remain as painfully simple as they were before (the lizalfos duels and your encounter with King Dodongo, the simplest boss in Zelda lore.)
Again, Goron City, as part of the overworld, has not changed at all. The characters have all remained the same and all say the same things. This was something they could have done, though I do suppose that the dungeons were more important and also more difficult to change and increase difficulty.
Thursday, September 16, 2010
Death Mountain, Ho!
Good old mountain climbing, right? Well, we've only climbed half of the summit and met with terrible danger (well, if you consider tumbling gorons and tektites terrible danger. I'm sure that young link isn't too happy about them.) but either way, there's much to be done in the goron's home of Goron City...but alas, we can't do it yet because we don't have bombs. So here we meet Darunia (for whom one of the towns in Zelda II was named...figure that out). He's not happy to see us, either. What?! Apparently he's been having a bad day ever since that villain with red hair came by, closed the opening to Dodongo's Cavern and infested it with monsters, cutting off his people's food supply and now the disaster of starvation (and who knows what might accompany that) are immenent. All right, I guess he has good reason to be in a bad mood. Like all classic NPCs, he'll help us get what we want (he holds the spiritual stone of fire) IF we help him. Oh, how nice. You're not going to help us unless we help you. Well, you're the authorities, shouldn't you have contingency plans in place? Ah, well. Not to mention that you play Saria's Song for this loser and he dances...fairly badly, too. Says it's got a "hot beat." Now, I like Saria's Song but it DEFINITELY doesn't have a hot beat. Oh, well. We'll get over it and run this little errand for you.
Kakariko Village
Ah, good old Kakariko. In this game, we discover that Impa and the Shieka founded the village; but it appeared before now (in A Link to the Past). What a nice place though, it looks very plantation-like, though it comes complete with a graveyard and a trail leading to Goron territory. One must wonder what else is beyond, however, there is much to do in this village, aside from beginning a side quest and collecting quite a few things. You have a lot of fun with cuccoos in this village, though I'm sure they don't have too much fun when they see you coming. Either way, though Kakariko isn't the major city of the game, it, as it did in Link to the Past, serves as the cross-roads to here, there and everywhere. (In fact, the citizens of Kakariko are proud that the village rivals Castle Town).
So here we start the mask trading side-quest. Not really much this will get us, but hey, it's kind of fun and it turns a little bit of a profit. This also introduces Link, and the player, to the concept of franchising/exportation (not to mention a little exploitation of the poor laborer who is only compensated with whatever profit he happens upon). Welcome to capitalism! Nice aside, Nintendo.
Our main goal is to get the guard to open the gate to the Death Mountain Trail. A simple task, really, we show him Zelda's letter (though he laughs at us and the princess...he's got cajones.) Then the fool has the audacity to ask a favor (which launches our side-quest.) Funny how a lot of NPCs work like that, they poke fun at us and then want us to do something for them (after all, we're just saving Hyrule...we surely have spare time on our hands!)
Master Quest Note - Again, nothing is different about this leg. Seems as though the programmers didn't do much to change the overworld nor the mini-puzzles that dot its landscapes.
The Ranch and The Woods
So first, a little side-questing. Yee-haw! Already, we can do some exploring without the game having a panic attack! Our side-quest nets us some more skulltulla tokens which prove invaluable to us later, and we also get a bottle of lon-lon milk, the real value being in that empty bottle we now have. Bottles are one of the best Zelda items ever. Now, has anyone noticed how lazy Talon is? Everytime we've met him so far, he's been sleeping around. How exactly is that good for productivity? We're not the only ones who share this opinion...his assistant, Ingo, thinks it's unfair that such a lazy bum has all the breaks and he has to slave all day making Talon look good...this jealousy eventually turns him evil later on, but I digress. He's pretty creepy so he's a fitting villain. Our major purpose of visiting was to see Malon, a reference to a previous game (as was Talon) and to learn Epona's Song. Now this flegling horse no longer fears us, in fact, she kind of likes us. Awwwe.
This is one of the more interesting synergies: after all, Malon and Talon were part of the Windfish's dream on Koholint Island, which if you remember from Link's Awakening, vanished when Link gathered the instruments of the sirens and awakened said Fish. These aren't the same characters, however, their connection is unmistakable: both sets of characters are father/daughter, both sets of characters work with land for their livelihood and both Talons are lazy, both Malons "appealing" to Link. It makes you wonder if the Windfish based those characters on these (most likely, as the events of LttP/Awakening happened after this title's.)
Anyway, we journey back to the Lost Woods for some nostalgia and a visit with Saria...she teaches us yet another song, one that will keep her close to our heart and says that "will be important later." After all, the girl feels as though the Sacred Meadow in which you found her will one day be important to both of you and there is no mistaking her intuition, right?
More things are to be found in the Lost Woods than just Saria, for a wandering eye (as well as Castle Town, for those interested). In the Lost Woods, a few games later and we have a piece of heart and a bigger slingshot bullet bag. Apparently, the denizens of these woods enjoy games. In Castle Town is the most frustrating mini-game yet: you have to have perfect aim, perfect timing and you have no room for error as you strike down ten targets for a bigger bullet bag. Was it worth it? Probably not, as we'll never use fifty bullets. But let us keep going. Our next stop is Kakariko Village, where Impa told us to go in the first place! (She didn't tell us we had time for errands but we ran them anyway!)
MasterQuest Note - Nothing different on this leg of the journey. Lon Lon Ranch and the Lost Woods retain the same structure that they did as before.
Visiting Hyrule Castle
The next stop on our journey is to visit the "Princess of Destiny" who lives in Hyrule Castle. There's just one problem...the guard doesn't know that we're destined to save Hyrule, so they're not going to let us in easily. We need to do a little stealth, and this is actually one of the most fun times to be had in the game. You get to sneak through the castle, past guards who if they catch you act extremely macho and proud that they've done so, but don't realize two seconds later that you're sneaking past them...again...in plain sight. It's no wonder Ganondorf has an easy time toppling this kingdom!
Anyway, when we get to the palace gardens, we find Zelda is spying on some sort of ceremony in which Ganondorf is in attendance. Apparently, she doesn't trust him (but her naive father does). Good instincts, princess! She also unlocks more of the tale for us, telling us some of the keys that will help us get to the sacred realm and how it is protected, hoping that by telling us we will be more enabled in protecting it from the evil she prophecied, that she believes to be Ganondorf himself (again, good instincts!) So now we know more of our true mission and what's going on in Hyrule...let's set off for that next spiritual stone (after we do a few things first, of course!).
Master Quest Note: There's not a single difference! You'd think that maybe, they'd have upped the intelligence of the vanguard, but it's still as easy as ever to sneak past them. What can you do, though?
The Great Deku Tree
In his omniscient creepiness, the Great Deku Tree asks us about our nightmares, and points out that their cause is the sources of evil in Hyrule are gaining strength and before we can set out to do anything about it, we must test our courage...so into the tree we go, which has been infested with vile monsters and other nasties.
This may just be one of the easiest dungeons in the entire series. The entire structure is based off the main room (the trunk) and you must venture from there to several side rooms above and below it in order to grab the map, compass, dungeon treasure and fight the boss in the depths below. To add to the ease, the boss of this dungeon is a walk in the park too. She simply walks around, not really guarding her weak spot, and once stunned, just lays there and allows Link to go to town on her eye with his sword. Not very difficult at all.
One way or another, we have successfully broken the curse...but the Great Deku Tree is still going to die, despite our valiant efforts. Before he does, though, he entrusts the Kokori Emerald to our care, one of the spiritual stones (the value of which will become more apparent to us soon). He instructs us to visit a "princess of destiny" and weaves a tale of an evil man from the desert who yearns for a sacred power left by the goddesses during creation. Hmm...I smell a connection to A Link to the Past, don't you? Well, we cannot disappoint the Great Deku Tree...let's be off! (Though the Kokori won't understand...after all, anyone who leaves these woods will die, right? I guess we'll find out.)
Master Quest Differences: This dungeon is only slightly harder in this version of the game. While it still serves as a tutorial dungeon; it also serves as a deterrent: it automatically spells out to the player that this is not the same game as the previous and it will be far more challenging. You are faced with enemies which you didn't have to face until your adulthood in this dungeon (the big deku-babas, for example) and the cerebral level of the dungeon is much more complex - you'll have to do a lot more thinking now that the puzzles have become harder, even though the dungeon's layout is nearly unchanged. However, the step-up in difficulty isn't too difficult, it will simply serve as a warning to the nonchalant player that this isn't the game they should be playing.
Kokiri Forest
So our adventure begins with a tutorial. But this is fun. See, the Great Deku Tree has summoned us, but the village bully, Mido, won't let us through unless we have a sword and shield (the game's way of saying you need a sword and shield). Well, lucky for us, Kokori leave money lying around and have left their greatest treasure, the Kokori Sword, in a not-so-secret meadow. We use the money to buy the shield and find the sword, all of this exploring teaching us about the game's physics and mechanics. At least we weren't taken to la-la land to do this! It was a fairly clever way to keep the story intact and still give us a little lesson. And as well, we get to meet Mido who is so entertaining in his lack of self-confidence (he reminds me of every bully I've ever known). Either way, the rest of the Kokori are very nice, for living such a sheltered life (they speak as though they never are allowed to leave the forest, which they aren't). We'll also use this opportunity to upgrade what we can (venturing to the Lost Woods lets us carry more Deku Sticks already, see, the game is full of secrets!) and then we walk right up to Mido and brush him aside. We have bigger fish we need to be frying!
The Adventure Begins...
So here we are, at the beginning of Ocarina of Time. Link is having a dream to start this title (reminiscent of the last title, ne?) when we traverse to current events. We meet Navi and the Great Deku Tree, Link's soon to be guide and the guardian of the forest, respectively. These two characters become staples to this series now. The Deku Tree seems omniscient, for he is aware of the evil that is starting to take hold in Hyrule. Also, the Deku Tree seems to already know of our destiny, for he speaks as though we will save Hyrule (although at this point we aren't here, we're simply being talked about). Gotta love know-it-all NPCs who run the plot. This, however, is one of the eeriest beginnings to a Zelda game yet.
After a great cinematic showing off the new graphics of the N64 and the expansive world we are about to explore in all of its beauty, Navi also shows that she's not so great at flying (she flies right into a wall and doesn't have a clue where Link lives, apparently). Rudely, in a scene that has been made fun of for an age, our new fairy wakes us up and keeps saying "hello!" to us. Link, of course, likes his sleep, so he's not budging for anybody here! The fairy finally realizes we don't know who she is, so she introduces herself. We, ourselves, are a young boy (for the first time...in the first two Zeldas, Link is a teenager and presumably is for Link's Awakening as well). What's amusing about all of this is that Link doesn't seem at all phased by Navi's presence. We're wanted by the Great Deku Tree, so let's get going!
Master Quest Note: Nothing is different about the overworld in Kokiri Forest, though it seems remarkably more difficult to collect rupees for the beginning of the adventure than it did in the original.
Ocarina of Time
The Ocarina of Time is a masterpiece. It is the title that got me to stop hating on the Zelda series (as a child, I didn't like the previous titles because they were difficult to me and aimless, with the exception of A Link to the Past which I never got to play until my adulthood). This game features a rich storyline, deep and intricate NPCs, a unique and easy-to-use combat system and best of all, it's huge! With all of the things one needs to do to complete a 100% play-through, this game represents hours upon hours of playtime, and it STILL has replay value! This game set the bar for modern gamers, and that bar has been met but not yet exceeded by other titles in the series or competitive titles.
Set in the very beginning of Zelda lore (it is argued that Zelda I, II, LttP and Link's Awakening all came after this title in chronology) this title follows Link as he travels the expansive land of Hyrule through space and time to chase away the evil that threatens it. The element of time is masterfully executed, and doesn't create a paradox for the gamer nor does it leave much room for disputation. Incorporating many of our past elements (heart pieces, collectables, music, magic and others) this Link is truly armed to the teeth. Excluding the map, the game gives you three screens for all of your stuff. Whew! Intimidating at first, but it's all fun to get. So let's get to it!
Set in the very beginning of Zelda lore (it is argued that Zelda I, II, LttP and Link's Awakening all came after this title in chronology) this title follows Link as he travels the expansive land of Hyrule through space and time to chase away the evil that threatens it. The element of time is masterfully executed, and doesn't create a paradox for the gamer nor does it leave much room for disputation. Incorporating many of our past elements (heart pieces, collectables, music, magic and others) this Link is truly armed to the teeth. Excluding the map, the game gives you three screens for all of your stuff. Whew! Intimidating at first, but it's all fun to get. So let's get to it!
Chapter 12: The Windfish Egg
So we journey into the Windfish's egg. Thanks to the magnifying glass which allowed us to read the book back in Mabe Village, this is the easiest dungeon ever: we simply follow the directions through the enemyless corridors to a pit, where Dethl, the ultimate nightmare awaits us. This boss takes several forms, but he is painstakingly easy. Especially his final form, which simply takes one boomerang shot to the eye (that was disappointing). Then we are escorted up some long stairs which seem to touch the heavens...where the owl reveals that he is part of the Wind Fish's soul, and he was in charge of guarding this island. The nightmares came and in their desire for permanency, caused chaos. That's a pretty good plot...seems very matrix. But now we play the song of awakening and before our eyes, the island of Koholint, and all the people on it, vanish. (Very VERY sad ending). Link awakens on what is left of his raft, and smiles as he looks up to see the Windfish flying above. Now I guess he's on his own to get back to Hyrule on the two logs on which he sits (nicely done ending for limited graphics though). Since I didn't have to continue, Marin floated around my "The End" screen in seagull form...I guess her wish was granted. At least we're ending on a somewhat happy note : )
Overall, this game was very entertaining. It kept lots of classic Zelda things while adding some dimensions, even if the storyline was a bit limited and the metaphor could go over many gamer's heads. For the limited Game Boy control scheme, you have a lot of options available to you and this paves the path to many fun puzzles. One of the limitations of this game is its slow progression, although this is the fastest run I have ever played of any Zelda, ever (as you can see by the time posts on this blog, I pretty much ran over this game). Replay value is moderate: I would replay it, but I also don't want to really do so knowing everything I do about Koholint now. Big disappointment in the ending; but not all endings can be happy, and the whole thing is sensible in the end.
Link's Awakening Overall: B
Chapter 11: Turtle Rock
So here we are, the final dungeon of Link's Awakening (not counting the Wind Fish Egg, of course). It's hell to pay, too...much like the last dungeons of every Zelda, this place is massive...and this is also where references start to become more directly tied into the games. For instance, while the rest of the dungeons were unique and had little to no reference to Hyrule, this is the last dungeon and shares name and external structure with the last dungeon of A Link to the Past. I love the synergy!
Either way, we start off this venture battling a giant tortoise that serves as the door to Turtle Rock. That was...interesting. Purpose of which is unknown, I guess it's better than saying "hey, the instrument of the siren is in HERE!"
One way or another, the puzzles of this dungeon couldn't be called too difficult by any means: they're about to get far more difficult in the later titles. However, one way or another, they're not simple either: this dungeon includes some new elements and because of its sheer size, it's no picnic.
Thanks to the invention of button-mashing, the boss, Hothead, turns out to be a pushover...you just spam the magic rod at him and he goes down fairly quickly. The only thing one has to worry about is the lava that's constantly being jetted out at you. Like the other nightmares before him, Hothead warns you and calls you foolish, except he's more violent about it, telling you outright that he will kill you so that you can't wake the Windfish. Yay.
Well, the Thunder Drum is now in our posession...counting the last instrument of the sirens. We are now almost ready to wake the Windfish...we need to finish trading a few things and etc.
The trading aspect of this game for an essential item adds a deeper dimension as well as more gameplay (something I like). Also, you have the option of when you continue on the trade quest, though you need certain items to advance, you don't need to beat even the seventh dungeon...all you need is the face shrine's prize and you can complete the quest, the final reward of which is the magnifying glass, telling us the solution to the Wind fish Egg's maze (and giving us access to the boomerang, something else Link must have dropped when he landed here).
So trading done, and all of the pieces of heart in hand (they lowered the number that a game usually has...you get far less heart containers in total by the process of the game, probably because they figured with all the necessary side-quests the player didn't want to be overly bothered by the optional side-quest of survivability, right? Wrong!) we are ready to climb Mt. Tamaranch and put an end to this dream world, tainted by nightmares.
Wednesday, September 15, 2010
Chapter 10: The Eagle's Tower
So I remember despising this dungeon when I was a little kid. I would constantly get the orb stuck in the wall, because the game loved to glitch like that, and I would have to start everything all over. Not to mention this is where the dungeons begin to get extremely complicated. While Face Shrine wasn't a picnic, Eagle's Tower proves some of the good masterminding behind the dungeoneering of these places. While the tower itself is a nice challenge in the form of complex and layered puzzles (you need to destroy part of the tower in order to advance, and once you do you no longer have access to one floor of the tower...so you better be sure you got everything!) the action is a little lacking...there is nothing here that under our current equipment arrangement we can't handle. However, this is the natural progression of Zelda...the first dungeons are action-heavy because we are ill-equipped, the last ones are puzzle heavy since we can slice and dice more easily. I do like how this game progressed with these elements and their balance. The boss, then, is a major let-down: the only real challenge is that if he manages to knock you off the tower, you have to start the entire battle over again. Well, a hookshot and mirror shield later, we have what we need. This dungeon continues the trend of lacking dungeon treasures: we don't get many cool items to aid us in our quest on Koholint. The mirror shield is no real better than our standard shield, except that it can't be consumed by Like-Likes and it reflects beams/fire (which in reality, is our key to advancing our quest).
After putting the Evil Eagle to rest atop this tower (he, too, warns us of our foolishness), we find that Marin was in the Tal Tal Mountain Range, doing what, she wouldn't tell us because Tarin comes for her and demands to know what she was doing (but she won't tell us). Then the owl swoops down and tells us that she sang her song in front of the wind fish...obviously, she intended to awaken the fish. How did she know our mission, and secondly, how did she know the key to doing so?
After putting the Evil Eagle to rest atop this tower (he, too, warns us of our foolishness), we find that Marin was in the Tal Tal Mountain Range, doing what, she wouldn't tell us because Tarin comes for her and demands to know what she was doing (but she won't tell us). Then the owl swoops down and tells us that she sang her song in front of the wind fish...obviously, she intended to awaken the fish. How did she know our mission, and secondly, how did she know the key to doing so?
Monday, September 13, 2010
Chapter 9: The Face Shrine
Already in another dungeon. This dungeon is quite complex in design, and involves several back-and-forths in order for successful exploration. The item of this dungeon is kind of lame: the powerful bracelet, a simple upgrade on an item we already have. I guess that the creativity level dropped a bit on this platform. Either way, the Face Shrine doesn't hold much in the way of action that it does for puzzle: for example, the boss is embedded in the floor. You need to think about how to beat him. It is the same for many of the enemies in this dungeon. You can't simply slice and dice your way through every room, you need to turn on your brain. I like that. Another big thing is that here, along with the place we needed to go to get the key here, we are told that Koholint is simply a dream of the Windfish, and waking him will make the island simply disappear. The nightmares are now incessentally warning us of this, seemingly wanting to protect the island from extinction. However, our owl friend insists that waking the windfish is the right step and continues to guide us, so there must be more to this story...so on we go to the signpost maze to meet wart, I mean Mamu, to learn a new ocarina song that will help us travel to the next dungeon.
Chapter 8: The Catfish's Maw
So we go from the soup into more soup. This game offers us our first crack at two dungeons with water-themes. It won't be the last, but it certainly isn't a convenient thing. Neither of these dungeons can be considered easy (puzzle or action dimension) but neither are as hard as the dungeons that are to come (the final dungeons of this game leading up to the Wind Fish are a, pun intended, nightmare). This dungeon's boss is interesting however, he is the first to mention the Wind Fish and is also the first to hint to the underlaying theme of your quest: do we truly know what we're doing? Do we truly know much about Koholint? I guess we'll have to unravel this mystery further.
Chapter 7: The Angler's Tunnel
Our first water-themed dungeon! Hooray. Yeah, right. This dungeon's puzzle's aren't too difficult to get around, but the maze-like structure of the entire tunnel makes it difficult to remember where one is and where they need to go next. One of the best things about this dungeon is that you will face cheep cheeps from Super Mario World in this game. Well, I guess evil creatures surface in more than one place. The prize of this dungeon are the flippers, allowing us to swim and opening more and more doors for us as we slowly explore all of Koholint. The boss of this dungeon is the Angler Fish...a disgustingly easy excuse for a boss, who may rank as one of the easiest bosses of Zelda lore. You simply slash at his face repeatedly (he doesn't really attack you, just sends minions slowly in your direction) and he'll die quickly. That was anti-climatic, wasn't it? Let's move on.
Our next step is to unravel the mystery behind the secret seashells. Now that we have the flippers, we can get 20 of these babies: this allows us to visit the Seashell Mansion where a better sword will form once we visit with twenty or more shells. Now that was worth waiting for! Our second sword gives us the classic sword beams of Zelda I and II, is twice as strong and just flat out rocks. So on with our adventure!
Our next step is to unravel the mystery behind the secret seashells. Now that we have the flippers, we can get 20 of these babies: this allows us to visit the Seashell Mansion where a better sword will form once we visit with twenty or more shells. Now that was worth waiting for! Our second sword gives us the classic sword beams of Zelda I and II, is twice as strong and just flat out rocks. So on with our adventure!
Sunday, September 12, 2010
Chapter 6: Yarna Desert and the Next Key
For the first time ever, someone joins Link as he adventures...even though Marin is just a traveler, you can get her to say some hilarious things. She gets agitated when Link "explores" other people's houses, she wants to spend Link's money at the trendy game, and she gets irritated when you hit the cuccoos. One thing I don't like about all this is the game makes a blatant sexual innuendo (You got Marin! This could be your big chance!) This game has nothing to do with sex at all, so knock that off! Either way, Marin essentially gushes to you and spins you a tale of her hopes and dreams, which is kind of touching, drawing you closer to that character...she kind of reminds me, though, of the protagonist of Moulin Rouge who also dreams of something more and just wants to wish for it and maybe, maybe, it'll happen. After the lovey-dovey is over, Marin agrees to go with you to the walrus, who is right now being an annoying road obstacle: we want into the Yarna Desert, after all, and he's not letting us through! (This reeks of Pokemon, which came out just around the same time. You had to use music to get rid of the Snorlax sleeping in the road there too...haha! I suppose with all of the Mario references in the game, the developers stopped worrying about that kind of thing). Once she's done serenading the monstrosity, a bunny from the village comes up to her and demands something...uh-huh. Well, from now on it seems, Marin will be singing for the animals in the village who are entranced by her melody. What a voice! A short stint through the Yarna Desert and a fight with the Lanmola (an easy fight, by the way) later, you have the key to the next dungeon...which is clear on the opposite side of Koholint. Well, yay! Let's get there now.
Chapter 5: Key Cavern
The Key Cavern is an interesting name for a dungeon, but it is so very appropriate...this place is full of locked doors, and the "key" (pardon my horrible pun) is to gather them all so that you can advance. The prize here are the Pegasus Boots, which open several doors for us now that we can traverse barriers. In the previous title, you didn't need to equip these, but with a limited button schematic, there really is no button on the GameBoy that can be devoted to dashing (in fact, one of your equipment buttons is held up by the sword for this reason). All that aside, this proves very useful, especially in defeating your quicker enemies that like to run away from Link!
The boss and mini-boss of the Key Cavern are an interesting pair...the mini-boss being a snake version of the dodongos we met way back in Zelda I, and the boss being an eye-blob, much like Vitreous. The thing here is the same as ever: if you know what you are doing, you have an easy battle, if you don't, then you are going to lose a lot of life energy trying to figure it out. I know that when I first played this game, the snakes gave me trouble because I didn't think to use bombs; and it took me awhile to figure out to split the eyes in two. Once you have the puzzle part of the battle out of the way though, you realize that both of these bosses are chumps with very little to throw at you. So let's grab the Sea Lily's Bell and get out of here! ^^
The boss and mini-boss of the Key Cavern are an interesting pair...the mini-boss being a snake version of the dodongos we met way back in Zelda I, and the boss being an eye-blob, much like Vitreous. The thing here is the same as ever: if you know what you are doing, you have an easy battle, if you don't, then you are going to lose a lot of life energy trying to figure it out. I know that when I first played this game, the snakes gave me trouble because I didn't think to use bombs; and it took me awhile to figure out to split the eyes in two. Once you have the puzzle part of the battle out of the way though, you realize that both of these bosses are chumps with very little to throw at you. So let's grab the Sea Lily's Bell and get out of here! ^^
Chapter 4: Kanalet Castle
So on our adventure and in exploring a new area of Koholint, we find Richard, an exiled prince who is whining about how he lost his "leaves" when he fled his castle. I can see why they kicked him out, he's nothing but a sniveling coward. But helping Richard is vital to our cause, so we storm Kanalet Castle, which we are told is the oldest structure standing on the island. Apparently, the land used to be ruled by a King but that King no longer holds any power though he still lives there. An odd arrangement, to be sure. It definitely adds to the mysticism that is Koholint. Within the castle we find that Richard's former vanguard, who went berserk, are in possession of his leaves and one by one, they drop all six of them. (At first, the coward tells us he only needs us to find one thing and he'll help us, and then after we agree, he mentions oh yeah, there are six of them). One way or another, after all of that work, does he have the key to the next dungeon? Not at all, he simply opens up a cave for us. What a rube! We must then search a huge field filled with potholes to find our way to the key, but this field puzzle is actually quite simple, since you have to go a certain way and so long as you move slowly so as not to reset the grass, you're golden.
Either way, this is one of the more interesting moments of the game where we start to realize that everyone on this island is going to be unique and new, so they are all given personality quirks and interesting twists to their character in order to distinguish Koholint and Hyrule, which are linked only truly by Link himself. The two lands are very different, and the NPCs only add to this depth.
Either way, this is one of the more interesting moments of the game where we start to realize that everyone on this island is going to be unique and new, so they are all given personality quirks and interesting twists to their character in order to distinguish Koholint and Hyrule, which are linked only truly by Link himself. The two lands are very different, and the NPCs only add to this depth.
Thursday, September 9, 2010
Chapter 3: Moblins and The Bottle Grotto
So you leave the Tail Cave all happy that your adventure is starting off so well, and you find out that the moblins who live here have kidnapped the beloved pet of Madame Bowwow. Well, let's go find the pooch, shall we? I'm sure it'll be worth our time. In the woods, we find the moblin's hideout where they are keeping the pooch, and our friend tells us to give the doggy a walk. He proves invaluable, getting rid of obstacles in the Swamp that we are supposed to go to next that we have no way of getting around. This lets us into the Bottle Grotto, which is a pain in the butt. The dungeon's bosses are irritating and its enemies a bother, not to mention its puzzles typically involve the power bracelet, which when you aren't using it, it's a pain to be reminded that you can't lift something! Rarrrgh! Either way, we eventually make our way to the Genie and free the Conch Horn from his grubby little hands. : )
Chapter 2: Tail Cave
Our first stop is the Mysterious Forest, where the key to the first dungeon is being held. A little bit of realism injected into this game: why would the dungeons be wide open for anyone to explore? The keys allow for the game to bring a lot of side-quests into the picture (not only does Link need to complete the dungeons themselves, he needs to finish sub-quests in order to gain access to these dungeons first). The Mysterious Forest isn't anything we can't handle right now and doesn't offer much except for a raccoon who has the sniffles: some magic powder after we get some and he gets out of our way! So now that we have more in our inventory, let's head off for the Tail Cave! I'm ready.
The first dungeon of this game is incredibly straight-forward. There are only three keys, and the enemies very simple (even for the step backwards in combat system). The Moldorm is the boss of this dungeon, and he is nothing to speak of either...you simply whack his tail enough times and he's out of submission (and he doesn't really attack you, he just randomly moves around). Maybe that's why this is called the Tail Cave, who knows. One way or another, this "nightmare" has been disposed of (call me an intruder, will you) and we can continue on with our adventure.
The first dungeon of this game is incredibly straight-forward. There are only three keys, and the enemies very simple (even for the step backwards in combat system). The Moldorm is the boss of this dungeon, and he is nothing to speak of either...you simply whack his tail enough times and he's out of submission (and he doesn't really attack you, he just randomly moves around). Maybe that's why this is called the Tail Cave, who knows. One way or another, this "nightmare" has been disposed of (call me an intruder, will you) and we can continue on with our adventure.
Chapter 1: Sword and Shield
Link wakes up in a bed on Koholint Island, no idea where he is, no idea where he's been, and awakens in the house of the friendly Marin and Tarin. He mistakes Marin for Zelda, who doesn't really mind and informs him of the situation: where he's landed, where she found him and otherwise. When Link talks to Tarin, this character gives him his shield, which reveals how these two knew our name. These two characters are the beginning of references that run rampant through this game: Marin looks like Peach while Tarin looks remarkably like Mario. Anyway, when we start this game, we are incredibly poorly equipped: in fact, we have nothing. The shield that Tarin gives us is our first item, and it is up to us to find our sword. Marin hints that since she found you on the shore, you might find the sword there. So we head there and lo and behold, there it is. Finally we can defend ourselves properly. The next thing to be done is to start the long line of trades that this game has as a side-quest. We go to the trendy store and win the yoshi doll, which the baby of the quadruplets in Mabe Village wants desperately. We take the ribbon from there to Madame Bow Wow's puppy, who is a bit of a materialist and accepts it eagerly, giving you a can of dog food in return. This we in turn take to Sale, an alligator, who eats the whole thing, can and all, and gives us a bunch of bananas in return.
Link's Awakening
Link's Awakening is the next installment in the Zelda series and is the first hand-held installment. This title is played on the Game Boy/Game Boy Color platform, and introduced Link to a new world: for the first time, Link explores a land other than Hyrule. The weird story of this game explores the same Link as A Link to the Past as he sets off to explore new lands and gets shipwrecked on Koholint Island, and must wake the Windfish in order to escape. Using the same kind of engine and schematics for a feel similar to that of A Link to the Past but also that of Zelda I, this game kept a legend going. So let's explore Koholint Island!
A Link to the Past in Review
So there we have it, A Link to the Past. This game is definitely one of the best in the series. Given the new graphics engine and the improvements made to the combat system, the series gained a new perspective and audience and became more popular with this title: it was more appealing to the eye and combat wasn't hard simply based on the low-graphics combat. Beyond this, and I think the major strength to this game, was its story. While the other two games had a story, it was pretty much all in the instruction manual, and the player had to use his or her imagination to incorporate the story into his gameplay. This game forces plot exposition in order to move forward, and the plot twists and turns, allowing for some neat surprises. We learn more about Hyrule, its history and the Triforce itself through this game than we do in any game before, and these story points are the jumping board for future plots, which follow this trend. In addition, Link's repetroire of items goes back to Zelda I days where the vast majority of his items require his action to use them, and many of them are interesting in their use and unique, while still maintaining the classics that we as Zelda players cannot live without.
Final Grade: A
Final Grade: A
The Final Battle!
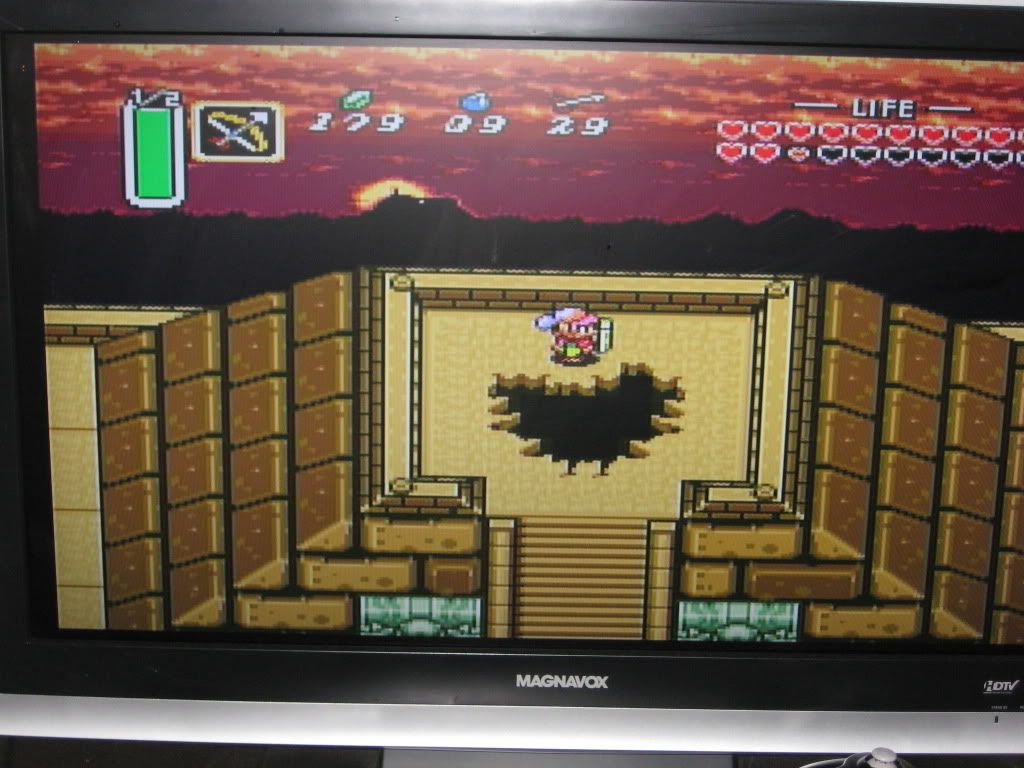 |
| Entering the Pyramid of Power |
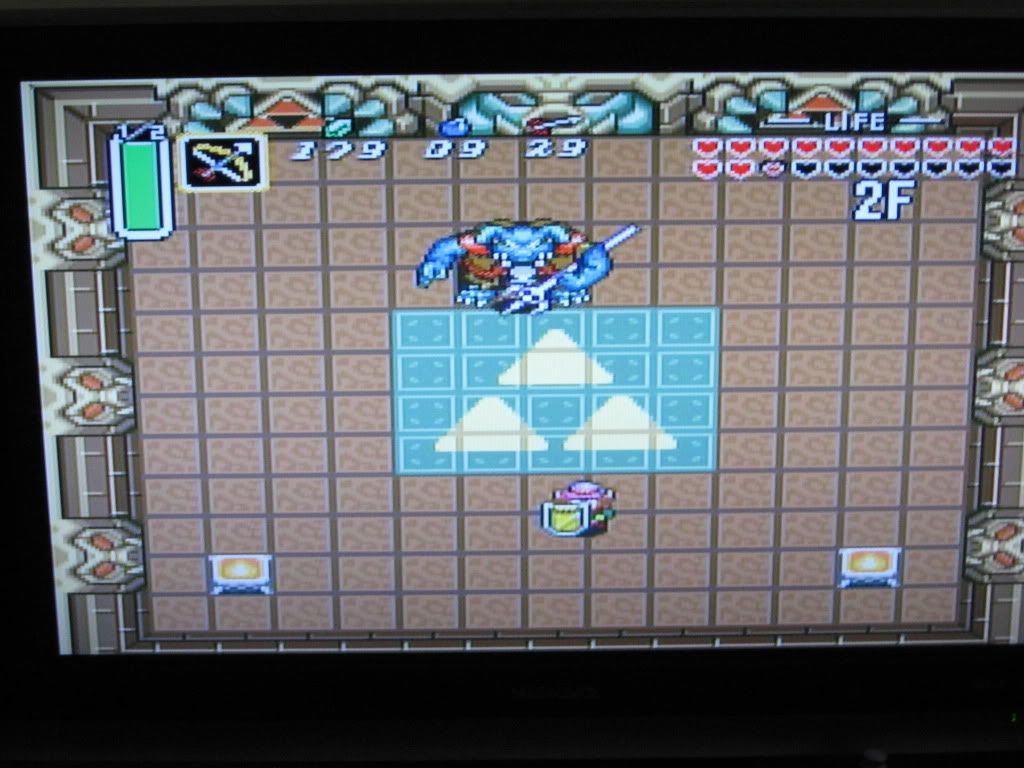 |
| Ganon, King of the Dark Realm |
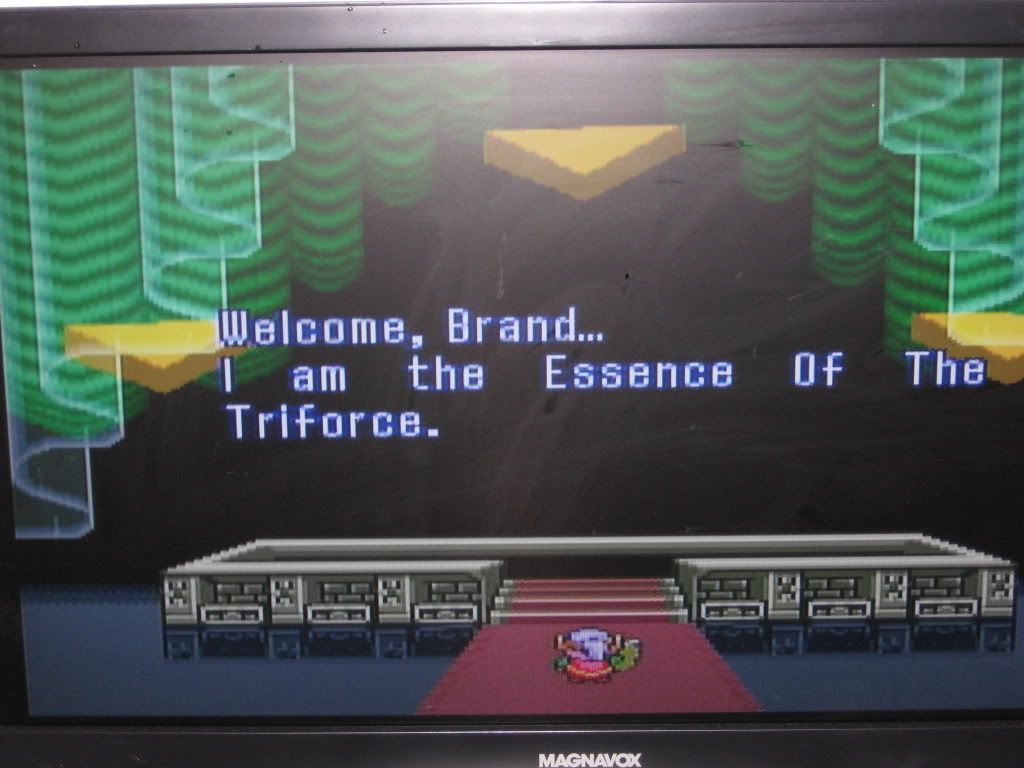 |
| The Triforce Welcomes a New Master |
 |
| The Master Sword Sleeps..FOREVER! |
Subscribe to:
Comments (Atom)